
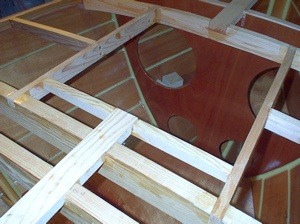
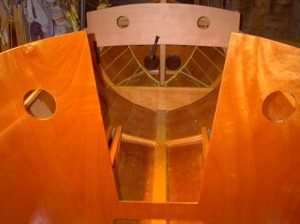
The forward deck framing as seen from the cockpit area. Our plan is to finish the deck framing bright and paint the underside of the deck a light colour, probably an off-white.
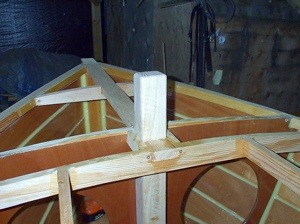
This picture shows the hatch framing in detail. I made the opening a little larger than designed. I couldn't get my shoulders through the original size. When finished it will be a bit smaller than shown here as the coaming pieces are fitted to the inside of the opening.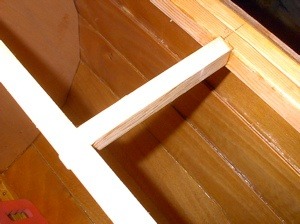
A detail of a side deck beam. These were sort of tricky to get fitted properly. I tried all the "easy" ways (clever patterns etc.) but in the end, careful work with my bevel gauge and precise measuring proved to be the best way.

The start of the aft deck framing, showing how the side decks merge into the aft deck. The deck framing to accommodate the outboard motor still needs to be added.
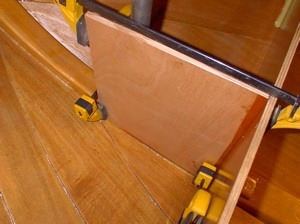
The first piece of the motor well box is glued into place. These long bar clamps are great for this sort of use. The one in the center bottom of the picture has been reversed and is pushing the corner of the piece into place. The box is made before the opening is cut out.
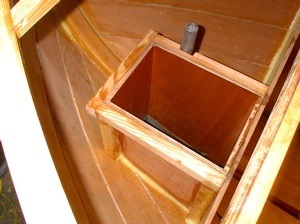
And magically, a short time later, there appears a motor well, framed and filleted into place. While not strictly a part of the "deck" as such, this work must be done before the deck can be installed or it will be a lot tougher working in such a small space. I also need to complete and install the box for the mizzen mast. There will be a sub deck flush with the motor well.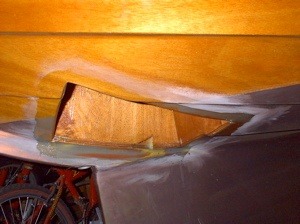
The outside view of the motor well. Once the box was built into the boat, the opening was rough cut first by a 1 inch spade drill bit with overlapping holes, then with saws, rasps, whatever does the job. You can see where I cut into the plywood side a bit. It has been repaired and soon the inside surfaces will be glassed, glass taped to the outside of the hull, made fair, and barrier coated with several coats of West epoxy and aluminum additive.
Finally, the Samson post (this one made of oak) is fitted into place. As it will be easier to fit the deck, the post will be removed until the deck is permanently installed and sheathed in glass/epoxy.
Even though the forward cabin trunk won't be installed until after the deck is on, I couldn't resist seeing what the trunk would look like in place…

This is the underside of the foredeck. It's faint but you can see that the location of the deck beams have been marked so they can be covered with masking tape ensuring a proper bond when we glue the deck down.
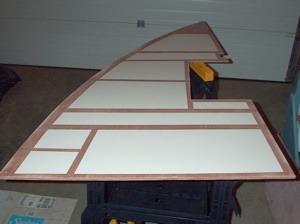
Here's the final result with the panel painted. The deck is ready for installation with no further interior finishing required. We're going to pre finish the deck beams too, saving a tough job that would have to be done later anyway. This is a slow process, so I expect the finishing to take at least a week before the installation of the deck can take place. This will give me a chance to finish the construction (mizzen box, motor well, sub deck, etc.) in the stern area before we can finally install the deck there. For those who may be interested, we mixed two parts of International Gloss White yacht enamel with one part Bristol Beige enamel to get the light beige or off-white we are using.

A big jump forward in time to where the decks are glued down, screw holes filled, final sanding done, and glassing with 6 ounce cloth and a few coats of resin have all been done. The hatch opening is visible in the middle of the deck. Once the decks were done the cabin trunk pieces were easily added.

Here's the aft deck as it is now. There will be another supporting post on the other side of the motor well opening. I'm leaving it off for now to provide better access for finishing later.