
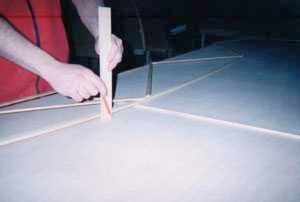
For Alistego we are trying out a new (to us) method of making patterns for the planks. We are using two long battens (22 feet) tack nailed to the moulds with shorter battens then screwed to the long ones in a truss-like pattern. This shows the rather challenging bend needed at the stern of the garboard pattern. Our battens are 1/2 inch by 3/4 inch Douglas Fir scarphed to this length. At first I was skeptical, but it worked really well. Hint: make sure the short battens always land near a station mould and the pattern won't shift at all when you remove it.
Once the pattern is taken from the boat, the shape can be traced onto your plywood. For the first try using this method I marked the pattern about 1/2 inch oversize by using a piece of wood outside the pattern as shown. I needed space to lay out 22 feet of plywood (the longest plank plus a bit for insurance). Here you can see that I have not scarphed the plywood sheets though they are positioned with the correct overlap (about 3 inches) to allow for the scarph to be cut later. This approach will allow us to use our planking stock as efficiently as possible.
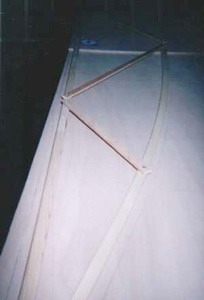
This is a better look at the pattern showing the outline traced a bit oversize during this trial of the method. The scarph overlaps are accurately drawn on the sheets and then the shapes are cut from the three plywood sheets with a hand held jigsaw. The scarphs are then planed to match (sorry, no pictures-I'll get some of the next planks we assemble). The joints are drilled and glued with thickened epoxy and the whole mess clamped to the bench with a scrap piece of plywood with screws spaced every two inches.
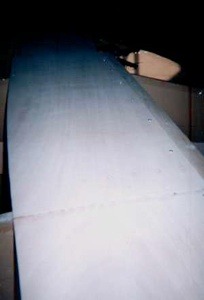
We placed the oversized garboard on the moulds and marked the actual plank lands on the plywood and trimmed it to the correct size and shape with a jigsaw and a block plane. We traced the actual shape of the keelson centerline and stem right on the boat. Here the assembled and shaped garboard is ready for installation on the moulds. The second garboard was cut out using a router and a pattern-cutting bit using the first garboard as a pattern.

Stem view of the installed garboard. We needed blocks and clamps to bring the plank down onto #2 here and #8 aft. It (#2) still lifted about 1/2 inch once the epoxy cured and the clamp was removed. As the curve is fair and both sides of the boat are the same, we are not concerned. Other boats I've built have done this with no later problems. Mild steel screws hold the plank to the stem/stern/keelson. Once the epoxy has gone off they are removed. I apply heat to the head of the screw with a 50 watt soldering iron to ensure the screw will be easily removed. Yes, I have snapped the heads off of a few of these--heat them well or you will too!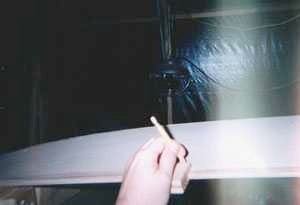
This staged shot shows the marking gauge I made to mark the plank overlaps on the planks. "Staged" because the bevel is already planed here. It is used with two hands when I'm not taking my own pictures!
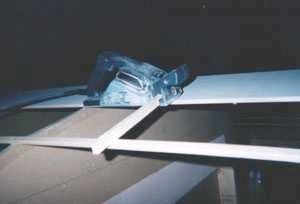
Here's the setup I use to plane accurate changing bevels on the plank edges. Just like Oughtred's "stringer" method in his book but adapted to the power planer. It only takes a few passes to remove most of the wood needed, so caution is required. I use my pattern-making batten as the guide stringer.

Here's the view the plank sees! Be sure to stop when the bevel reaches the overlap (3/4 inch) line or you get to the last lamination of the plywood. The ash bar attached to the planer is set so it is as high above the planing surface as the batten is thick. This method is about as foolproof as it can be. I did this by "eye" on my first boat. Surprisingly it worked out OK but was not quite as accurate as this method.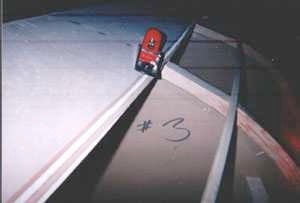
As always, I go the last little distance with my block plane. Learn to sharpen it properly and keep it that way-you'll never regret it. This picture shows the changing bevel nicely, as well as the machined flat for the second plank at station 3. You can just make out the permanent silicon bronze screws holding the planking to station 3 to the left of the plane.