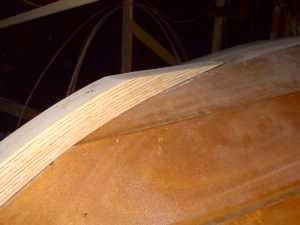
Before building a pattern for the deadwood, I trimmed the outer stem and stern at an appropriate scarph angle for mating to the deadwood.
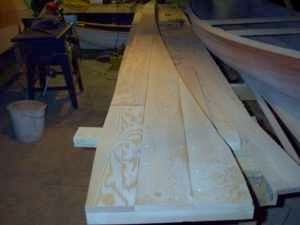
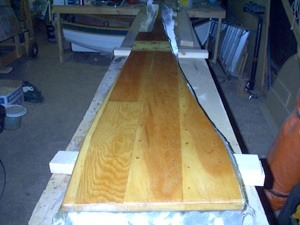
This rather sudden jump ahead was due to my forgetting completely to take some pictures. The pattern for the deadwood was made along the same lines as the plank patterns, using sticks and battens to define the shape, carefully checking the plans for dimensions. Here the assembly is comprised of 3 layers of 3/4 inch Douglas fir, with the grain alternating directions. The center layer has the grain running vertically which made it easy to build in "channels" for the keel bolts. These holes are slightly oversize so will allow for some adjustment and will need to be filled with resin.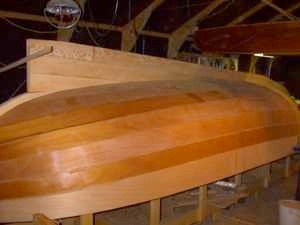
Deadwood in place for a test fit. The fit was actually very good. The spiling to the hull was done with only one layer of the 3/4 inch Douglas fir laminated together, to make it easier for frequent test fittings as the fit was fine tuned. Still to be done is the cutting of the "notch" for the lead ballast keel and adding more layers of fir in the keel area to arrive at the required 4 inch thickness.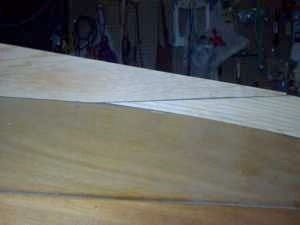
This is a closer look at the fit between the laminated outer stem and the deadwood. The entire deadwood was laminated from 3/4 inch by 6 inch boards. There will also be a 4 mm ply spacer on each side in way of the ballast keel to get as close to the required 4 inch thickness as possible.
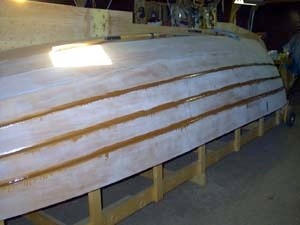
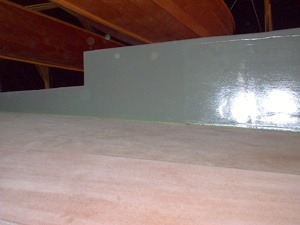
Here we are back in the "shop" for another season of building. This is about where we left her last fall when the cold weather set in and rather forcefully ended my ability to use epoxy. As a result, the deadwood of beautiful old growth Douglas Fir checked in a few places. This shouldn't be a problem as it was due to be glassed and coated with West barrier additive anyway. This shot shows the port side sanded and the final 3 fillets in place. My wife's double paddle for her Wee Rob canoe is out of harm's way on the garboard!
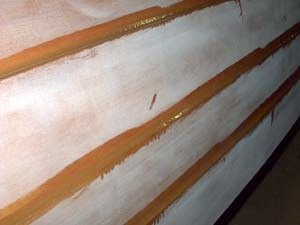
A closer view of the new fillets. I use a mixture of colour matched wood flour and WEST 406 to form the fillets. I used a plastic tube with about a 1.5 inch diameter to shape the lap fillets. As can be seen these fillets do a good job of sealing the plywood's end grain while keeping with the traditional look of lapstrake planking. Most of the weave of the cloth is filled, but another coat or two of epoxy will be applied, with a few more coats added below the waterline incorporating the barrier additive. This is actually a bit of overkill but the aluminum additive will really improve the abrasion resistance of the lower hull. We did this on a fiberglass boat we once owned (to cure a blistering problem) and it really made for a tough bottom.

The starboard side with the first three fillets that were done last fall. Next I'll sand all the plank surfaces to level them up followed by a sealing coat of resin on the exposed end grain of the ply. Finally the last three fillets will be added to this side too. The deadwood is still not permanently installed on the boat.
Finally the completed and fitted deadwood assembly is glassed. Another builder of the boat suggested a laminated deadwood as his, made with large timbers, showed an unacceptable amount of movement.
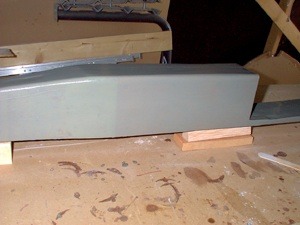
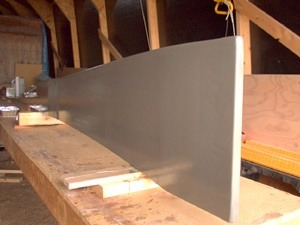
Here is the forward part of the deadwood once finished. The gray colour is the aluminum barrier coat additive. The tapered areas where the deadwood gets thicker for the ballast were moulded from epoxy/thickener mixtures and then shaped accordingly. I have used this technique in other boats and can actually model complex shapes quite easily.
At last! The deadwood is finally mounted onto the hull. We'll add some strengthening fillets along the hull-deadwood joint, give everything a good thorough sanding, and give the hull a few coats of epoxy to fill the weave and get the surface leveled up. Then the waterline can be defined and the lower hull will get several coats of barrier additive/resin to match the deadwood.